
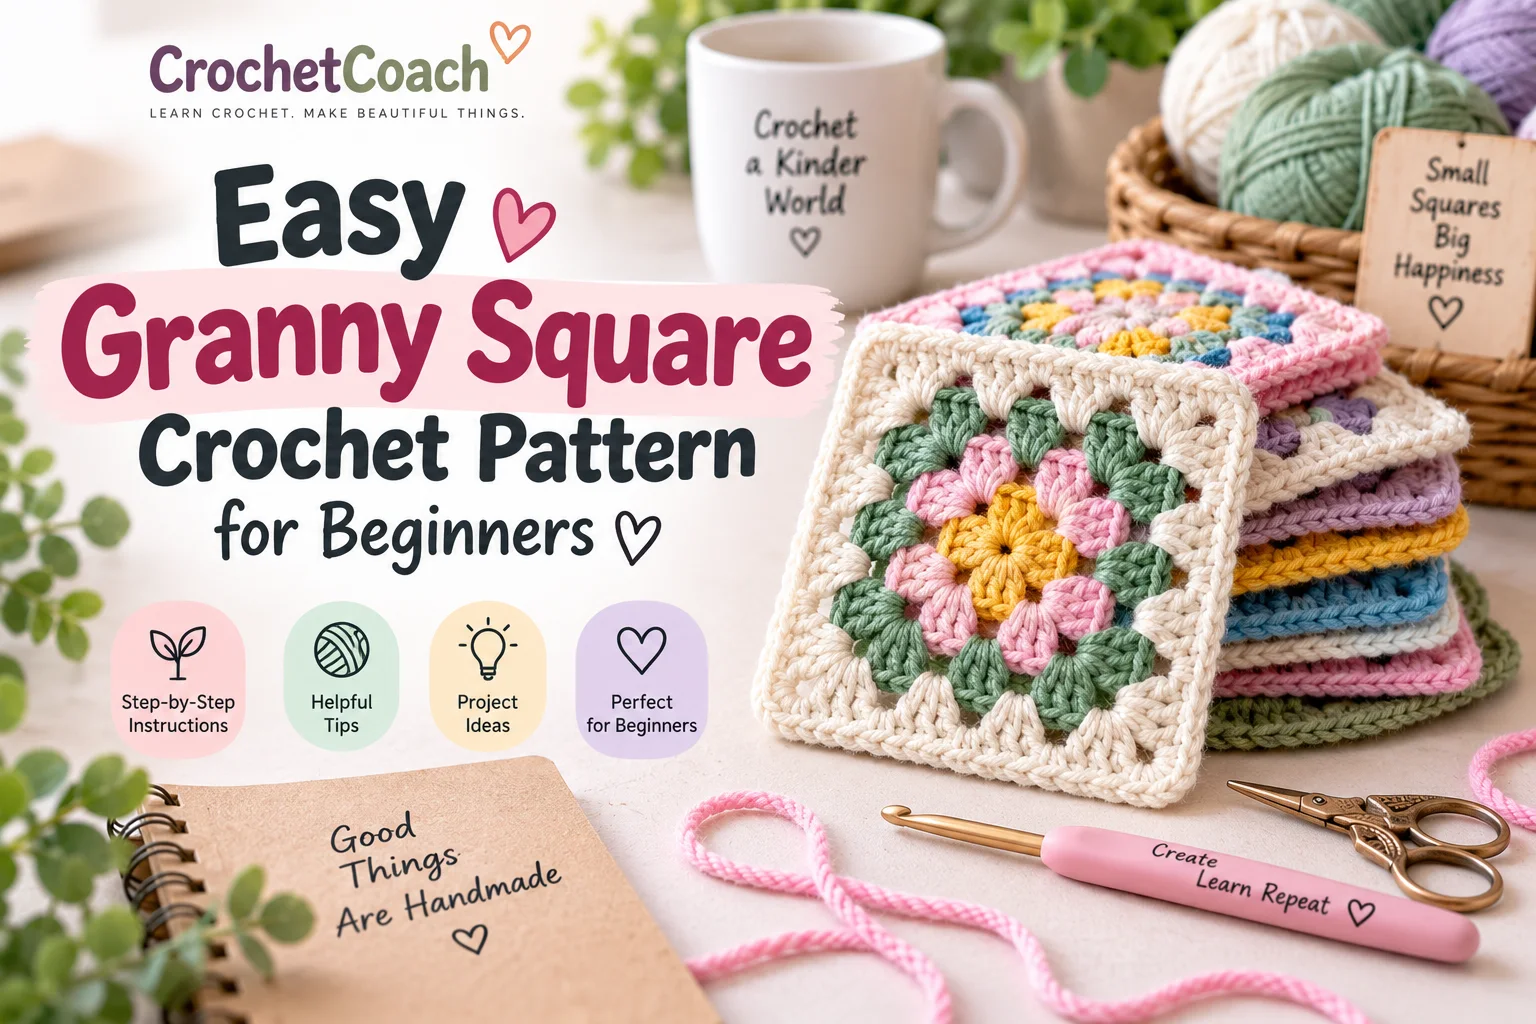
If you’re learning crochet, the granny square crochet pattern is one of the most useful designs you can master.
A classic granny square is made in rounds from the center outward using simple groups of double crochet stitches and chain spaces.
Once you learn the basic construction, you can use granny squares to make blankets, tote bags, scarves, pillows, cardigans and dozens of other crochet projects.
This beginner-friendly guide will show you exactly how to crochet a classic granny square step by step.
Granny Square Pattern at a Glance
| Detail | Pattern Info |
|---|---|
| Skill Level | Beginner |
| Crochet Terms | US |
| Construction | Worked in rounds |
| Main Stitch | Double Crochet |
| Shape | Square |
| Yarn | Worsted / Medium Weight |
| Hook | 4.5–5.0 mm |
| Approx. Time | 15–30 minutes |
| Pattern Style | Classic Granny Square |
Traditional granny-square projects are commonly rated beginner or easy, and they can be scaled from a single motif into larger blankets and accessories.
Materials You’ll Need
For one beginner granny square, prepare:
- Medium-weight yarn
- 4.5–5.0 mm crochet hook
- Scissors
- Yarn needle
- Stitch marker if desired
You can use one color or several colors.
For beginners, I recommend using a smooth, light-colored yarn because it makes your stitches and chain spaces easier to see.
Crochet Abbreviations
This pattern uses U.S. crochet terminology.
| Abbreviation | Meaning |
|---|---|
| ch | Chain |
| dc | Double Crochet |
| sl st | Slip Stitch |
| sp | Space |
| st | Stitch |
| sts | Stitches |
A granny cluster in this tutorial means:
3 double crochet stitches worked into the same chain space.
Before You Start
A granny square is built around four corners.
Each corner needs a chain space so the fabric can turn and remain square.
The most important beginner rule is simple:
Corners receive two granny clusters separated by chains.
Side spaces receive one granny cluster.
Once you understand that rule, the pattern becomes much easier to remember.
Step 1: Make the Center Ring
Start with your yarn.
Ch 4.
Join with a slip stitch into the first chain to form a small ring.
You will crochet the first round into the center of this ring.
You can also use a magic ring if you’re comfortable with that technique.
Round 1
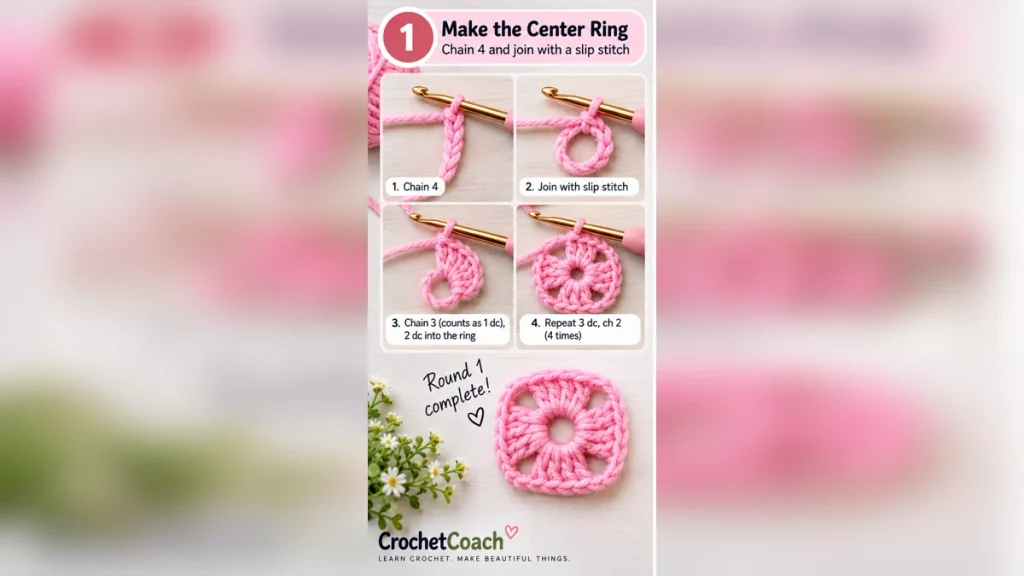
Ch 3.
This turning chain counts as the first double crochet.
Work:
2 dc into the ring.
You now have your first 3-dc group.
Then:
Ch 2.
Repeat the following three more times:
3 dc into ring, ch 2.
At the end you should have:
- 4 granny clusters
- 4 corner spaces
Join with a slip stitch to the top of the beginning chain.
Your work should now resemble a tiny square.
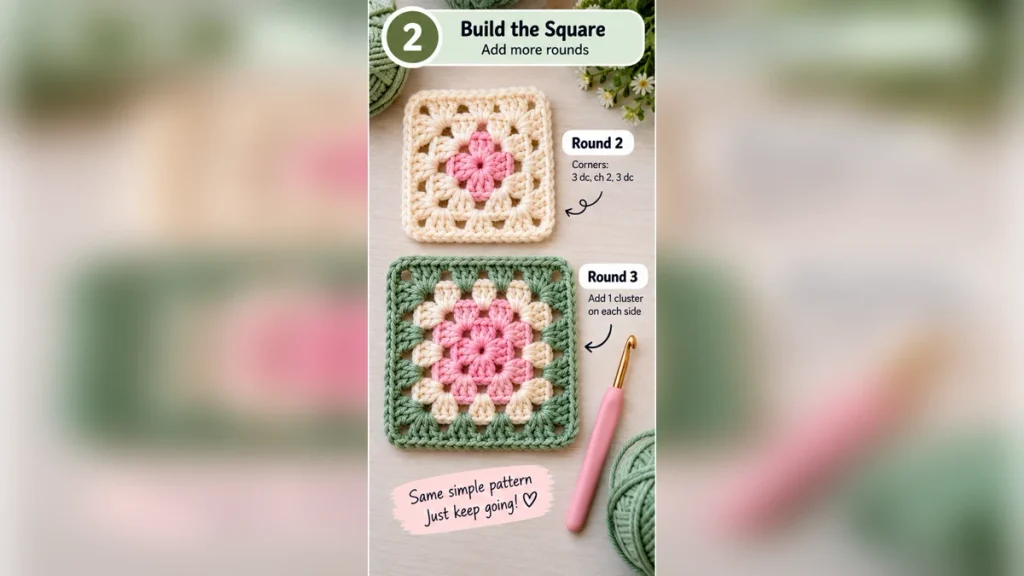
Round 2
If you’re changing colors, attach your new yarn into any corner space.
Ch 3.
Then work:
2 dc, ch 2, 3 dc
into the same corner space.
This creates the first corner.
Move to the next corner.
Work:
3 dc, ch 2, 3 dc
into that corner.
Repeat in each remaining corner.
Join with a slip stitch.
At the end of Round 2, you should have four clearly defined corners.
Round 3
Begin in a corner space.
Work:
3 dc, ch 2, 3 dc
into the corner.
Now you will see a space between the corners along each side.
Into that side space work:
3 dc
Then work the next corner:
3 dc, ch 2, 3 dc
Continue around the square:
- One granny cluster in each side space
- Two granny clusters separated by chains in each corner
Join with a slip stitch.
Round 4
Round 4 follows the exact same logic.
In every corner:
3 dc, ch 2, 3 dc
In every side chain space:
3 dc
As your square grows, the number of side spaces increases.
That means each new round becomes larger, but the construction rule stays the same.
The Easy Granny Square Formula
Once you understand this formula, you don’t need to memorize every round:
Corners
3 dc, ch 2, 3 dc
Side Spaces
3 dc
Repeat those rules around the square.
You can continue adding rounds until your granny square reaches the size you want.
This ability to keep expanding the same basic motif is one reason granny-square construction works so well for throws and larger projects. Lion Brand, for example, currently lists both individual-square and large granny-style afghan patterns as easy-level projects.
How Big Should a Granny Square Be?
There is no single correct size.
A granny square can be:
- 2–3 inches for small motifs
- 4–6 inches for bags and blankets
- 8 inches or larger for oversized projects
- Continued indefinitely for a giant granny-square blanket
For reference, Lion Brand has current granny-square blanket patterns using motifs around 6 inches, while other designs use considerably larger squares depending on yarn and construction.
Your yarn weight, hook size and tension will affect the final measurement.
How to Change Colors
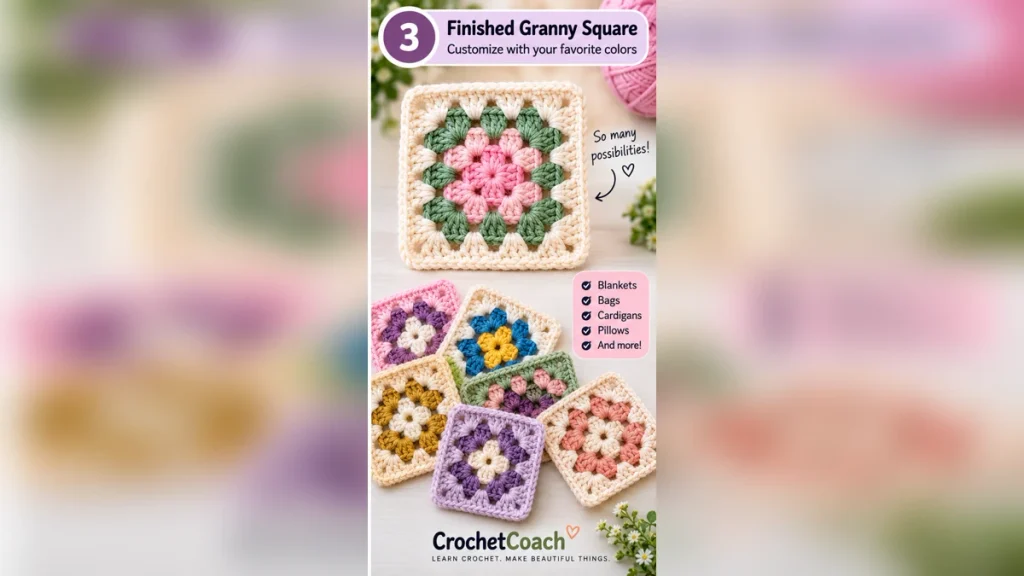
Granny squares are perfect for experimenting with color.
At the end of a round:
- Finish the round.
- Fasten off.
- Join the new color in any corner space.
- Continue the next round normally.
You can change color:
- Every round
- Every two rounds
- Only once
- Not at all
A single-color granny square can look very modern, while multiple colors create the classic vintage style.
How to Keep Your Granny Square Straight
Sometimes granny squares begin to twist slightly as they grow.
To reduce this:
Don’t crochet too tightly
Very tight tension can distort the corners.
Keep corner chains consistent
Use the same number of corner chains throughout the project.
Block the finished square
Blocking helps straighten edges and corners.
Try turning between rounds
For larger projects, some crocheters alternate the direction of their work between rounds to reduce twisting.
How to Finish Your Granny Square
Once the square reaches your desired size:
- Finish your final round.
- Join with a slip stitch.
- Cut the yarn.
- Pull the yarn through.
- Weave the ends securely using a yarn needle.
If you’re planning to join several squares, leave enough yarn where appropriate for your preferred joining method.
Should You Block Granny Squares?
For projects involving several squares, blocking can be very helpful.
It can:
- Make squares more uniform
- Straighten corners
- Improve stitch definition
- Make joining easier
Don’t stretch the square aggressively.
Shape it gently to the dimensions you need and allow it to dry according to your yarn’s care instructions.
Yarnspirations also emphasizes checking gauge and tension when final sizing matters.
7 Projects You Can Make With Granny Squares
Once you’ve mastered the basic pattern, you can turn your squares into much larger projects.
1. Granny Square Blanket
One of the classic uses.
Make many squares and join them together, or continue one giant square.
2. Crochet Tote Bag
Join several granny squares to create bag panels.
3. Granny Square Cardigan
A more advanced project, but one of the most visually attractive uses of the motif.
4. Crochet Pillow Cover
Four or more squares can create a colorful cushion front.
5. Granny Square Scarf
Join small squares into a long strip.
Yarnspirations currently offers beginner granny-square scarf designs as well.
6. Crochet Vest
Use larger squares or combinations of squares to create wearable panels.
7. Small Pouches and Accessories
Leftover granny squares can become:
- Pouches
- Mug cozies
- Coasters
- Small bags
Current beginner collections from Yarnspirations include granny-square bags, coasters, mug accessories and other small projects, showing how versatile the motif is.
Common Granny Square Mistakes
The Square Turns Into a Circle
You’re probably missing corner chain spaces.
Remember:
Every corner needs two clusters separated by chains.
My Granny Square Is Wavy
Your hook may be too large, your chain spaces may be too loose, or you may have accidentally added extra clusters.
My Square Curls
Your tension may be too tight.
Try using a slightly larger hook or loosening your stitches.
I Can’t Find the Corners
Mark the four corner spaces with stitch markers until you’re comfortable recognizing them.
My Square Is Twisting
Try blocking the square or turning your work between rounds.
My Squares Aren’t the Same Size
Use:
- The same yarn
- Same hook size
- Similar tension
- Same number of rounds
Granny Square FAQ
Is a granny square good for beginners?
Yes. Granny-square patterns are frequently categorized as beginner or easy projects because the same stitch groups and spaces repeat around each round.
What stitch is used for a classic granny square?
The classic version mainly uses double crochet stitches, chains and slip stitches.
How many granny squares do I need for a blanket?
It depends on the size of each square and the finished blanket dimensions.
For example, if your squares measure 6 inches, a blanket made from them will need more individual motifs than one made with 10-inch squares.
Why is my granny square not square?
The most common causes are missing corner chains, incorrect stitch placement or inconsistent tension.
Can I make a granny square with one color?
Yes. A solid-color classic granny square uses exactly the same construction.
Can I use different yarn weights?
Yes, but changing yarn weight will change the finished size and texture.
Use a hook appropriate for the yarn you’re using.
Do I need a gauge swatch?
For one decorative square, gauge usually isn’t critical.
For fitted garments or projects that need a specific finished size, gauge becomes much more important. Yarnspirations explicitly recommends checking gauge for patterns where sizing matters.
What We’ll Make Next
Easy Crochet Tote Bag Pattern for Beginners
Easy Crochet Baby Blanket Pattern for Beginners
Easy Granny Square Cardigan Crochet Pattern
15 Easy Crochet Sweater Patterns for Beginners (Free & Stylish)
Easy Granny Square Crochet Pattern for Beginners
Final Thoughts
Learning a granny square crochet pattern gives you one simple technique that can be reused in dozens of projects.
Start with a small four-round square and focus on recognizing the corners and chain spaces.
Once the pattern starts feeling natural, experiment with colors, yarn weights and larger projects.
A simple granny square can eventually become a blanket, bag, scarf, cardigan or almost anything you can build from crochet motifs
Hello, I absolutely love your granny square tutorials. I will be so grateful if you can send me these patterns, especially the small granny squares.
Thank you so much
Tilly Naidoo
South Africa