
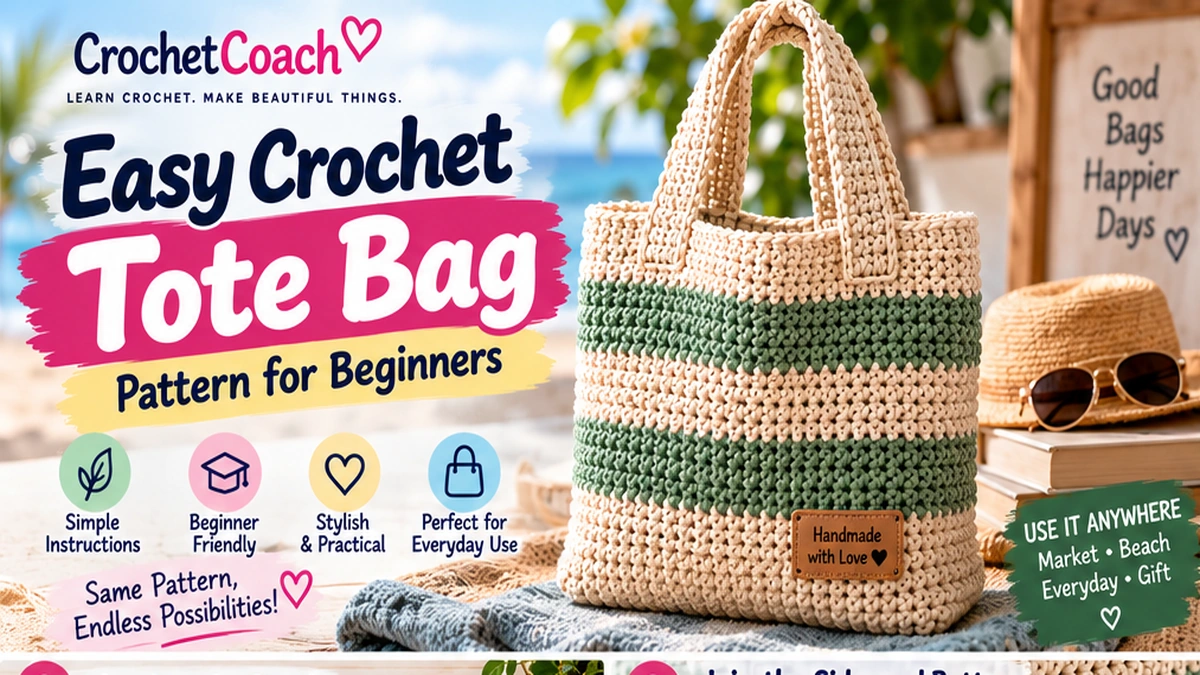
A handmade crochet tote bag is one of those projects that is both fun to make and genuinely useful. You can carry it to the market, use it as an everyday bag, take it to the beach, or customize it as a handmade gift.
This crochet tote bag pattern is designed with beginners in mind. It uses simple stitches, straightforward construction, and an easy rectangular shape, so you don’t need advanced crochet skills to make a beautiful finished bag.
In this tutorial, you’ll learn how to crochet the bag panels, join them together, add sturdy handles, adjust the size, and make your tote stronger for everyday use.
Crochet Tote Bag Pattern at a Glance
| Detail | Pattern Information |
|---|---|
| Skill Level | Easy / Beginner |
| Crochet Terms | US |
| Main Stitch | Half Double Crochet |
| Construction | Two rectangular panels |
| Finished Size | Approx. 14 × 15 in (36 × 38 cm), excluding handles |
| Yarn | Medium #4 cotton yarn |
| Hook | 5 mm (H-8) |
| Handles | Crocheted separately |
| Pattern Style | Simple, customizable tote |
The finished measurements are approximate. Your yarn, hook size, and individual tension can change the final size.
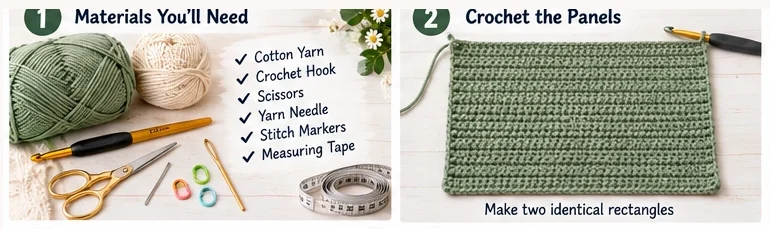
Materials You’ll Need
For this beginner crochet tote bag, you’ll need:
- Approximately 450–550 yards of medium-weight cotton yarn
- 5 mm crochet hook
- Scissors
- Yarn needle
- Stitch markers
- Measuring tape
Cotton yarn is an excellent choice for tote bags because it creates a sturdy fabric with relatively little stretch compared with many softer fibers.
You can also use a cotton blend if you prefer a slightly softer finished bag.
Crochet Abbreviations
This pattern uses US crochet terminology.
| Abbreviation | Meaning |
|---|---|
| ch | Chain |
| hdc | Half Double Crochet |
| sc | Single Crochet |
| sl st | Slip Stitch |
| st/sts | Stitch/Stitches |
You can find standardized crochet abbreviations from the Craft Yarn Council.
Skills You Need
This pattern is suitable for beginners who already know how to:
- Make a slip knot
- Crochet a foundation chain
- Work half double crochet
- Single crochet
- Fasten off
- Weave in yarn ends
If you’re still learning the basics, practice your stitches first. Keeping your tension consistent will make the sides of your finished tote much straighter.
Free Crochet Tote Bag Pattern
The bag is constructed from:
2 body panels + 2 handles
First, you’ll crochet two identical rectangles. Then you’ll join the sides and bottom before attaching the handles.
This construction is much easier for beginners than complicated seamless bag shaping.
Finished Size
The sample dimensions are approximately:
Width: 14 inches / 36 cm
Height: 15 inches / 38 cm
These measurements exclude the handles.
Because crochet gauge varies, use the measurements as your primary guide rather than relying only on the number of rows.
Step 1: Crochet the First Bag Panel
Start with your main yarn color.
Chain 51.
Row 1
Hdc in the second chain from the hook and in each chain across.
50 hdc
Turn.
Row 2
Ch 1.
Hdc in each stitch across.
50 hdc
Turn.
Rows 3–40
Repeat Row 2.
Continue until your rectangle measures approximately:
14 inches wide × 15 inches tall
If your panel reaches 15 inches before Row 40, stop there.
If it is still too short, add additional rows.
The exact number of rows is less important than achieving the dimensions you want.
Fasten off, leaving a tail for weaving in later.
Step 2: Crochet the Second Panel
Make another rectangle exactly like the first.
Try to use the same:
- Yarn
- Hook
- Stitch count
- Number of rows
- Tension
Place both panels on a flat surface when finished.
They should be approximately the same width and height.
Small differences can usually be corrected during assembly, but matching panels will create a cleaner-looking tote.
Step 3: Check Your Panels Before Joining
Before assembling the bag, place one panel directly on top of the other.
Align:
- The bottom edges
- Both side edges
- The top openings
If one panel is slightly longer, gently reshape it.
For larger differences, it may be better to add or remove a row before joining.
This is also a good time to weave in any yarn tails that won’t be used for assembly.
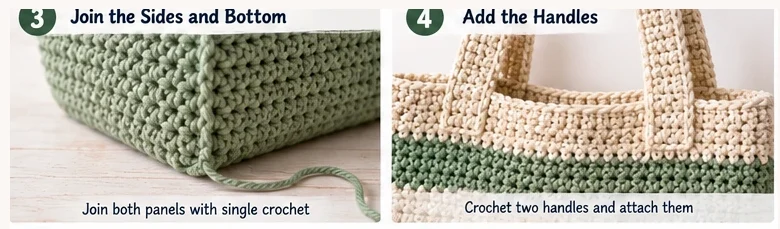
Step 4: Join the Tote Bag
Place the two panels together with the sides you want facing outward positioned appropriately for your preferred joining method.
You need to join:
Left side → Bottom → Right side
Leave the top completely open.
A simple beginner-friendly option is single crochet.
Attach your yarn near one upper corner.
Work single crochet evenly down the first side.
Continue across the bottom.
Then single crochet up the opposite side.
Fasten off.
Try to space your stitches evenly along the row ends so the seam doesn’t become wavy or overly tight.
Alternative Joining Method
If you want a less visible seam, use a yarn needle and whip stitch the panels together.
Both methods work.
Single crochet creates a more defined decorative seam, while sewing can produce a flatter finish.
Step 5: Turn and Shape the Bag
If you joined the bag with the seam intended to sit inside, turn the tote right side out.
Use your fingers to gently shape the lower corners.
You should now have the basic body of your crochet tote.
Before adding handles, check the opening.
If the top edge feels loose or uneven, you can add a finishing round.
Step 6: Add a Top Border
Attach yarn to the top edge.
Work:
1 sc evenly around the entire opening
Join with a slip stitch.
For a slightly stronger top edge, add another round:
1 sc in each stitch around
Join and fasten off.
A reinforced upper edge helps the tote maintain its shape and provides a more stable area for attaching the handles.
Step 7: Crochet the Handles
Make two identical handles.
Handle
Chain 61.
Row 1
Sc in the second chain from the hook and across.
60 sc
Turn.
Row 2
Ch 1.
Sc across.
Turn.
Row 3
Repeat Row 2.
Fasten off, leaving a long tail for sewing.
Make the second handle exactly the same way.
The finished handle length will depend on your gauge.
Before attaching the handles permanently, hold one against the bag and check whether the length feels comfortable.
Step 8: Attach the Handles
Lay the tote flat.
Position the first handle approximately 3–4 inches (7.5–10 cm) from each side edge.
Use stitch markers to hold both ends in place.
Position the second handle on the opposite side, making sure it lines up with the first.
Before sewing, check that:
- Both handles are the same length
- Neither handle is twisted
- The placement is symmetrical
Use a yarn needle and matching yarn to sew each handle securely to the bag.
For extra strength, sew a small square or rectangular area at each attachment point rather than using only one line of stitches.
The handles are one of the highest-stress areas of a tote bag, so secure them carefully.
How to Make the Handles Stronger
Crochet naturally stretches, especially when a bag carries heavier objects.
There are several ways to strengthen your handles.
Use Cotton Yarn
Cotton generally stretches less than many soft acrylic yarns.
Crochet Tightly
Dense stitches create a firmer strap.
Make the Handles Wider
Adding another row or two can make the handles feel more substantial.
Reinforce the Attachment Points
Sew repeatedly through the handle and bag fabric where they connect.
Add Non-Stretch Support
For a tote intended to carry heavier items, you can reinforce the crochet handle with suitable fabric webbing, ribbon, or another sturdy non-stretch material.
Optional: Add a Fabric Lining
A lining isn’t required, but it can significantly change how the finished bag behaves.
Crochet fabric naturally has small openings and can stretch under weight.
A fabric lining can:
- Reduce stretching
- Prevent small objects from poking through stitches
- Give the bag more structure
- Create a cleaner interior
- Allow you to add pockets
Choose a lightweight or medium-weight woven fabric.
Cut the lining slightly larger than the inside dimensions of your bag to allow for seams.
Sew the fabric into a pouch, place it inside the crochet tote, fold the top raw edge inward, and hand-sew it around the inside of the opening.
How to Make the Tote Bag Wider
The easiest way to change the width is to adjust your starting chain.
For a wider bag:
Add more chains.
For a narrower bag:
Use fewer chains.
Instead of focusing on a specific stitch count, crochet your starting chain until it is close to your desired finished width.
Remember that the first row can slightly change the measurement.
How to Make the Tote Bag Taller
Changing the height is even easier.
Simply crochet more or fewer rows.
For a taller tote:
Add rows.
For a shorter tote:
Stop earlier.
Measure your panel regularly while crocheting.
This makes the pattern easy to adapt into a small everyday bag, larger shopping tote, or beach bag.
How to Add Stripes
You don’t have to make the entire tote in one color.
Try combinations such as:
Cream + Sage
Beige + Terracotta
White + Blue
Pink + Cream
Lavender + White
For simple horizontal stripes, change yarn colors at the end of a row.
You could change colors every:
- 2 rows
- 4 rows
- 5 rows
- 10 rows
Consistent stripe widths create a clean appearance, while irregular stripes can produce a more playful handmade design.
Color Block Crochet Tote
Another easy variation is color blocking.
For example:
Rows 1–15: Beige
Rows 16–30: Cream
Rows 31–40: Sage
You can also make the handles in a contrasting color.
This allows you to create several visually different bags using exactly the same basic pattern.
How to Add a Pocket
A simple crochet pocket can be added to the inside or outside.
Crochet a small rectangle using the same half double crochet pattern.
For example:
Ch 21
Hdc across and continue until the rectangle reaches your desired pocket height.
Fasten off.
Position the pocket on the bag.
Sew:
Left side + Bottom + Right side
Leave the top open.
A contrasting pocket can also become a decorative feature.
How to Make a Sturdier Crochet Tote Bag
If you want your tote to hold its shape better, focus on four things.
1. Yarn Choice
Choose a relatively firm yarn such as cotton.
2. Dense Stitches
Avoid an excessively loose gauge.
3. Reinforced Handles
Secure the handles thoroughly and consider non-stretch reinforcement for heavier loads.
4. Add a Lining
A fabric lining can help reduce stretching and improve structure.
These changes are especially useful if you plan to use the bag frequently rather than primarily as a decorative project.
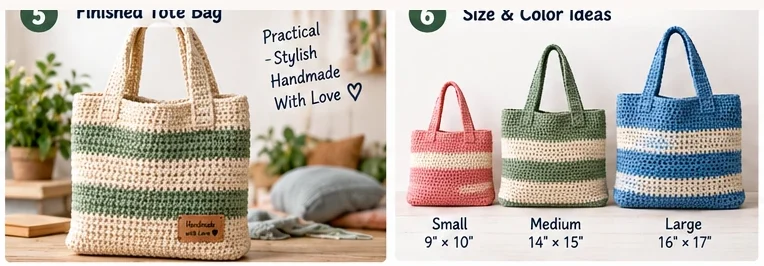
Crochet Tote Bag Size Guide
You can use the basic construction to create several sizes.
| Tote Size | Approx. Width | Approx. Height | Suggested Use |
|---|---|---|---|
| Mini | 9 in | 10 in | Small essentials |
| Small | 11 in | 12 in | Everyday bag |
| Medium | 14 in | 15 in | Standard tote |
| Large | 16 in | 17 in | Shopping |
| XL | 18+ in | 18+ in | Beach / large carry bag |
These measurements are only starting points.
Crochet is easy to customize, so choose dimensions based on how you want to use the finished bag.
Common Crochet Tote Bag Problems
My Bag Is Stretching Too Much
This can happen when using stretchy yarn, loose stitches, or carrying heavy items.
Try a denser gauge, cotton yarn, reinforced handles, and a fabric lining.
My Sides Aren’t Straight
You may be accidentally adding or skipping stitches.
Count your stitches regularly.
Every row of the main panel should contain the same number of stitches unless you’re intentionally shaping the bag.
One Panel Is Bigger Than the Other
Compare the panels before joining.
Check the number of rows and stitches.
If the difference is small, blocking or gentle reshaping may help. Larger differences are better corrected before assembly.
My Seam Looks Wavy
You may be adding too many joining stitches along the side edges.
Space your stitches evenly and avoid forcing extra stitches into the seam.
My Handles Stretch
Crocheted handles naturally have some stretch.
Use tighter stitches, make the strap wider, reinforce the attachment points, or add a non-stretch support material.
My Bag Doesn’t Hold Its Shape
A loose gauge or very soft yarn can create a floppy tote.
Try a firmer yarn, smaller hook, denser stitch pattern, or fabric lining.
Beginner Tips for a Better Tote Bag
Count Your Stitches
Check your stitch count every few rows.
Fixing a missed stitch early is much easier than discovering uneven sides after finishing the entire panel.
Measure Both Panels
Don’t rely only on row count.
Measure the actual dimensions because tension can change while you crochet.
Use Stitch Markers
Markers are helpful when positioning handles and keeping both sides symmetrical.
Don’t Rush the Assembly
A beautiful crochet panel can still produce a messy-looking bag if the seams and handles are uneven.
Take your time when joining and sewing.
Weave in Ends Securely
Tote bags are handled frequently, so loose yarn tails can become noticeable quickly.
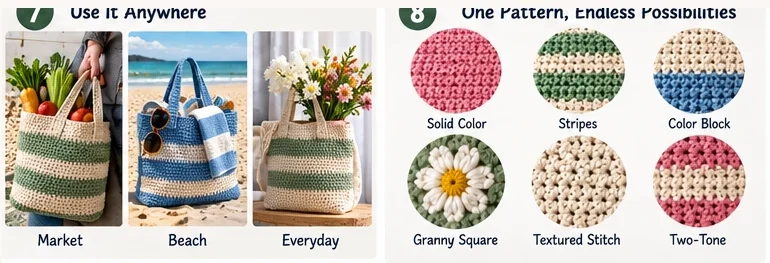
Crochet Tote Bag Variations
Once you’ve made the basic version, try creating:
- Striped crochet tote
- Color-block tote
- Granny square tote
- Beach tote
- Small book bag
- Crochet project bag
- Two-tone tote
- Tote with an inside pocket
- Tote with fabric lining
- Tote with reinforced straps
One basic construction can produce many completely different designs.
Frequently Asked Questions
Is a crochet tote bag easy for beginners?
Yes. A simple tote made from two rectangular panels is an excellent beginner project because it requires very little shaping. You mainly need to know how to chain and work basic stitches consistently.
What yarn is best for a crochet tote bag?
Cotton yarn is a popular option because it creates a relatively sturdy fabric and generally has less stretch than many softer yarns. Cotton blends can also work well.
How much yarn do I need for a crochet tote bag?
For the medium beginner tote in this tutorial, approximately 450–550 yards of medium-weight yarn is a reasonable starting estimate. Actual usage varies with yarn, gauge, bag dimensions, handles, and any modifications.
What crochet stitch is best for a tote bag?
There isn’t one universal best stitch. Half double crochet works well for this beginner pattern because it is simple and builds fabric relatively quickly. Single crochet creates a denser fabric, while other stitch patterns can be used for decorative bags.
Should I line my crochet tote bag?
You don’t have to, but lining can reduce stretching, add structure, protect small items, and create a more finished interior.
How do I stop crochet bag handles from stretching?
Use dense stitches, choose a relatively firm yarn, make the straps wider, reinforce the attachment points, or add a non-stretch material inside or alongside the handles.
Can I make this tote bigger?
Yes. Increase the starting chain for more width and crochet additional rows for more height.
Can I use acrylic yarn?
Yes, but the finished behavior may differ. Some acrylic yarns can stretch more than cotton, particularly when the bag carries weight. Consider a lining and reinforced straps if needed.
Final Thoughts
This crochet tote bag pattern is a great project for turning basic crochet skills into something practical.
The construction is simple:
Crochet two rectangles → Join the sides and bottom → Finish the top → Make two handles → Attach them securely.
Once you’ve completed the basic version, you can easily customize it with different colors, stripes, pockets, longer handles, a fabric lining, or your own dimensions.
Most importantly, don’t worry if your first tote isn’t perfectly symmetrical. Focus on consistent stitches, careful assembly, and secure handles. Each project will make your crochet skills stronger.