
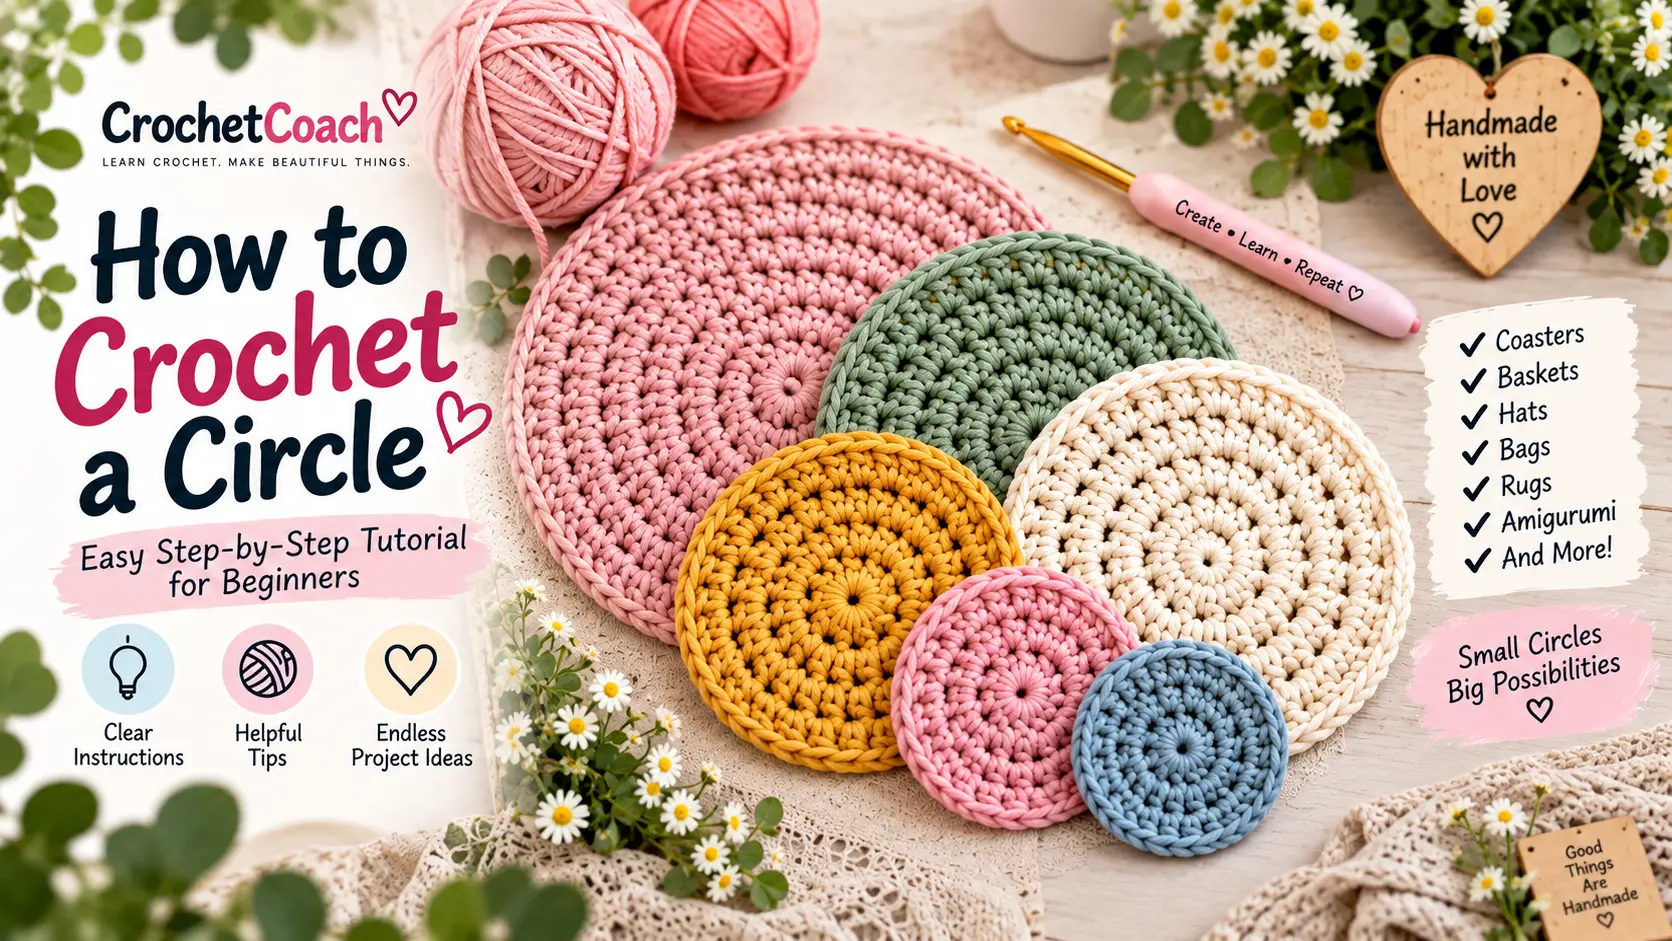
Learning how to crochet a circle is one of those skills that unlocks dozens of new crochet projects.
Once you understand the basic circle formula, you can use it to make coasters, baskets, bags, hats, placemats, rugs, amigurumi pieces and many other round projects.
And the best part?
You don’t need to memorize a different pattern every time.
A flat crochet circle follows a simple principle: increase evenly as the circle grows. Too few increases can make the fabric curl into a bowl, while too many can create ruffles or waves.
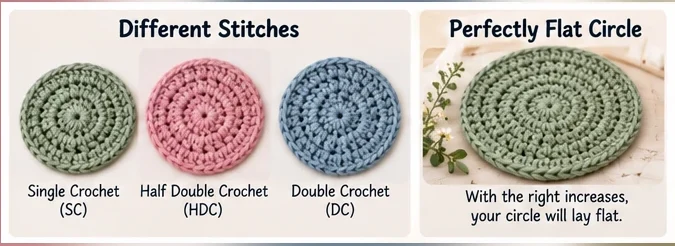
In this beginner tutorial, you’ll learn how to crochet a circle step by step, how to keep it flat, how to make it look round instead of hexagonal, and how to adapt the technique for single, half double and double crochet.
Crochet Circle Quick Guide
Skill level: Beginner
Terminology: US crochet terms
Construction: Worked from the center outward
Best beginner stitch: Single crochet
Starting method: Magic ring or chain loop
Main technique: Even increases
Materials
You’ll need:
- Yarn
- Crochet hook suitable for your yarn
- Stitch marker
- Scissors
- Yarn needle
For learning, choose a smooth, light-colored yarn. It’s much easier to see individual stitches than with fuzzy or very dark yarn.
The Secret to Crocheting a Flat Circle
Before picking up your hook, understand this rule.
If you start a single crochet circle with 6 stitches, a common starting point is to add 6 stitches every round:
| Round | Total Stitches | Basic Increase Pattern |
|---|---|---|
| 1 | 6 | 6 sc into ring |
| 2 | 12 | Increase in every stitch |
| 3 | 18 | 1 sc, inc |
| 4 | 24 | 2 sc, inc |
| 5 | 30 | 3 sc, inc |
| 6 | 36 | 4 sc, inc |
| 7 | 42 | 5 sc, inc |
| 8 | 48 | 6 sc, inc |
| 9 | 54 | 7 sc, inc |
| 10 | 60 | 8 sc, inc |
The pattern is easy to remember:
Each new round adds one more regular stitch between increases.
This same underlying principle appears throughout current flat-circle tutorials.
How to Crochet a Circle Step by Step

Let’s make our first circle using single crochet (sc).
Step 1: Make a Magic Ring
Create a magic ring and insert your hook into the center.
If you haven’t learned the magic ring yet, don’t worry—we’ll cover an alternative starting method later.
Don’t close the ring completely until you’ve worked your first stitches into it.
Step 2: Crochet 6 Single Crochet Stitches
Work:
6 sc into the magic ring.
Pull the yarn tail gently to close the center.
You now have:
6 stitches.
This is Round 1.
Place a stitch marker in your first stitch if you’re working in a continuous spiral.
Step 3: Increase in Every Stitch
Round 2:
Work 2 sc into every stitch around.
In crochet terminology, making two stitches into one stitch is an increase (inc).
So:
Inc × 6 = 12 stitches
Your small circle should begin expanding outward.
Step 4: Add One Stitch Between Increases
Round 3:
(1 sc, inc) × 6
You should finish with:
18 stitches.
Notice what changed.
Instead of increasing in every stitch, we’ve placed one regular single crochet between each increase.
Step 5: Add Two Stitches Between Increases
Round 4:
(2 sc, inc) × 6
Total:
24 stitches.
Step 6: Continue the Pattern
Round 5:
(3 sc, inc) × 6 = 30
Round 6:
(4 sc, inc) × 6 = 36
Round 7:
(5 sc, inc) × 6 = 42
You can continue following the same principle until your circle reaches the size you need.
The Crochet Circle Formula
Here’s the part worth remembering rather than memorizing individual rounds.
If your first round contains X stitches, the usual starting formula adds approximately X stitches per round.
For our SC example:
6 → 12 → 18 → 24 → 30 → 36…
B.Hooked’s flat-circle reference applies this concept across different stitch heights, using starting counts of 6 SC, 8 HDC, 10 DC, 12 TR and 14 double treble as baseline examples.
That gives us this useful reference:
| Stitch | Typical Starting Count | R2 | R3 | R4 | R5 |
|---|---|---|---|---|---|
| Single Crochet | 6 | 12 | 18 | 24 | 30 |
| Half Double Crochet | 8 | 16 | 24 | 32 | 40 |
| Double Crochet | 10 | 20 | 30 | 40 | 50 |
| Treble Crochet | 12 | 24 | 36 | 48 | 60 |
Important: treat these as starting guidelines, not an unbreakable law. Yarn, hook size and especially your personal gauge can change how many increases your fabric actually needs to remain flat. Some detailed circle tutorials explicitly point out that two crocheters using the same nominal formula can get different results because stitch height-to-width ratio and tension differ.
How to Make a Crochet Circle More Round
If you follow:
(1 sc, inc) × 6
then:
(2 sc, inc) × 6
then:
(3 sc, inc) × 6
your increases tend to sit directly above one another.
As the circle becomes larger, those repeated increase points can become visible and the piece may begin looking slightly like a hexagon rather than a smooth circle.
The solution is to stagger your increases.
Instead of stacking every increase in exactly the same position, shift their placement while keeping them evenly distributed and maintaining the correct total stitch count.
This approach is specifically used in current tutorials to produce a smoother, rounder edge.
Remember:
Stitch count controls flatness.
Increase placement improves roundness.
That’s a much better mental model than simply memorizing rounds.
Continuous Spiral vs Joined Rounds
There are two common ways to crochet circles.
Continuous Spiral
You don’t slip stitch at the end of each round.
You simply continue into the next round.
Advantages:
Smooth appearance and less visible seam.
Best for: amigurumi and projects where you don’t want a noticeable join.
Use a stitch marker because it becomes easy to lose the beginning of your round.
Joined Rounds
Finish each round with a slip stitch before beginning the next.
Advantages:
It’s easier to identify individual rounds and manage color changes.
Handy Little Me, for example, uses a continuous spiral for its SC version and joined rounds for its DC circle.
How to Crochet a Circle Without a Magic Ring
Can’t make a magic ring yet?
You can still crochet a circle.
Ch 4.
Slip stitch into the first chain to form a small loop.
Then work your Round 1 stitches into the center.
Several beginner circle tutorials teach both the magic-ring and chain-loop methods.
The main difference is that a chain loop may leave a slightly more visible center hole.
How to Crochet a Circle with Half Double Crochet
For a basic HDC circle, try starting with:
Round 1: 8 hdc into magic ring — 8
Round 2: Inc around — 16
Round 3: (1 hdc, inc) × 8 — 24
Round 4: (2 hdc, inc) × 8 — 32
Round 5: (3 hdc, inc) × 8 — 40
Continue using the same progression.
How to Crochet a Circle with Double Crochet
Because double crochet stitches are taller, you’ll generally begin with more stitches than for SC.
A useful baseline is:
Round 1: 10 dc — 10
Round 2: 2 dc in each stitch — 20
Round 3: (1 dc, inc) × 10 — 30
Round 4: (2 dc, inc) × 10 — 40
Round 5: (3 dc, inc) × 10 — 50
Some tutorials use 10, while others use 12 DC stitches as the initial count, reinforcing why tension and construction matter rather than there being one universal number.
Why Is My Crochet Circle Curling?
This is probably the most useful troubleshooting section in the article.
If your crochet circle starts looking like a bowl:
Possible causes:
- Too few increases
- Tight tension
- Hook too small for your yarn
- Missed stitches
- Your gauge needs a slightly different increase rate
First thing to check
Count your stitches.
If Round 6 should contain 36 SC but you have only 34, you’ve probably missed increases.
If your count is correct but the circle still cups, try loosening your tension or adjusting the increase rate for your gauge.
Current flat-circle guides similarly recommend checking increases and hook/tension when a circle curls.
Why Is My Crochet Circle Wavy?
The opposite problem can happen.
Instead of curling upward, your circle develops ruffled or wavy edges.
That usually indicates that the outside edge is growing faster than the fabric can remain flat.
Common causes:
- Too many increases
- Loose tension
- Hook too large
- Accidental extra stitches
If you accidentally made 38 stitches where you needed 36, for example, those extra stitches can contribute to rippling.
Don’t automatically add more increases when you see a problem—first identify whether you’re dealing with cupping or ruffling, because the fixes are opposite.
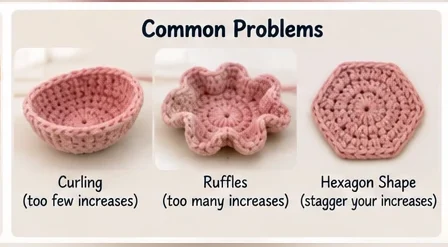
Crochet Circle Troubleshooting Chart
| Problem | Likely Cause | Try This |
|---|---|---|
| Circle curls upward | Too few increases | Check stitch count/increase rate |
| Edge ruffles | Too many increases | Reduce/check increases |
| Circle looks hexagonal | Increases stacked | Stagger increase positions |
| Center hole too large | Starting ring | Use/tighten magic ring |
| Visible seam | Joined rounds | Try spiral rounds |
| Circle gets uneven | Lost/gained stitches | Use stitch markers |
| Fabric too stiff | Tight tension/small hook | Try a larger hook |
| Fabric too loose | Loose tension/large hook | Try a smaller hook |
How to Crochet a Circle to Any Size
Once you understand the formula, you don’t need instructions saying:
“Make exactly 10 rounds.”
Continue adding rounds while maintaining your increase pattern.
For example:
SC circle
R8 = 48
R9 = 54
R10 = 60
R11 = 66
R12 = 72…
Measure the diameter from one side of the circle through the center to the opposite side.
Stop when it reaches the size required for your project.
That’s how the same basic skill can produce a tiny coaster or become the base of a much larger basket or rug.
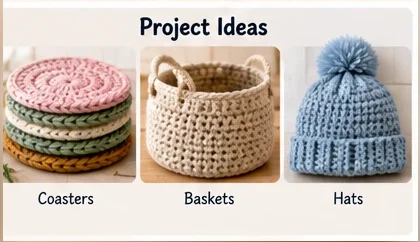
What Can You Make with Crochet Circles?
Once you know how to crochet circles, try using them for:
Coasters — stop after a few rounds.
Placemats — continue increasing.
Baskets — create a flat base, then stop increasing to make the sides rise.
Bags — use circles as panels or bases.
Hats — increase the crown before shaping the sides.
Amigurumi — the same principles of increases and decreases create 3D forms.
Rugs — continue the circle with thicker yarn.
This explains why learning circles is much more valuable than simply learning one small pattern.
FAQ
How do you crochet a circle for beginners?
Start with a magic ring, work your first round of stitches into it, then increase evenly in subsequent rounds. For a basic single-crochet circle, a common progression is 6, 12, 18, 24 and 30 stitches.
How many stitches do I need to crochet a flat circle?
It depends on stitch height and your gauge. A common baseline is around 6 for SC, 8 for HDC and 10–12 for DC.
Why won’t my crochet circle lay flat?
Cupping often indicates too few increases or tight gauge, while ruffling usually points toward too many increases or loose gauge.
How do I make my crochet circle perfectly round?
Keep your total increases evenly distributed but stagger their positions instead of stacking them directly above one another. This reduces the polygon/hexagon effect.
Can I crochet a circle without a magic ring?
Yes. Chain a few stitches, join them into a loop with a slip stitch and work the first round into that loop.
Can I make a crochet circle as large as I want?
Yes. Continue applying the increase principle while checking that your particular fabric remains flat.
Final Thoughts
Learning how to crochet a circle becomes much easier once you stop thinking of it as a long list of rounds and start understanding the logic behind it.
For a basic single crochet circle:
6 → 12 → 18 → 24 → 30 → 36…
Increase evenly, add another regular stitch between increases as the rounds grow, and adjust when your yarn, hook or tension tells you the fabric needs it.
If the circle cups, investigate whether it needs more room.
If it ruffles, check whether you’re giving it too much.
And if it stays flat but begins looking like a hexagon, stagger the increases.
Once you’ve understood those three ideas, you haven’t just learned one crochet circle pattern—you’ve learned a technique you can reuse in countless crochet projects.
[…] If you need extra help working from the center outward, your existing guide to crocheting circles explains the basic principle clearly. How to Crochet a Circle […]