
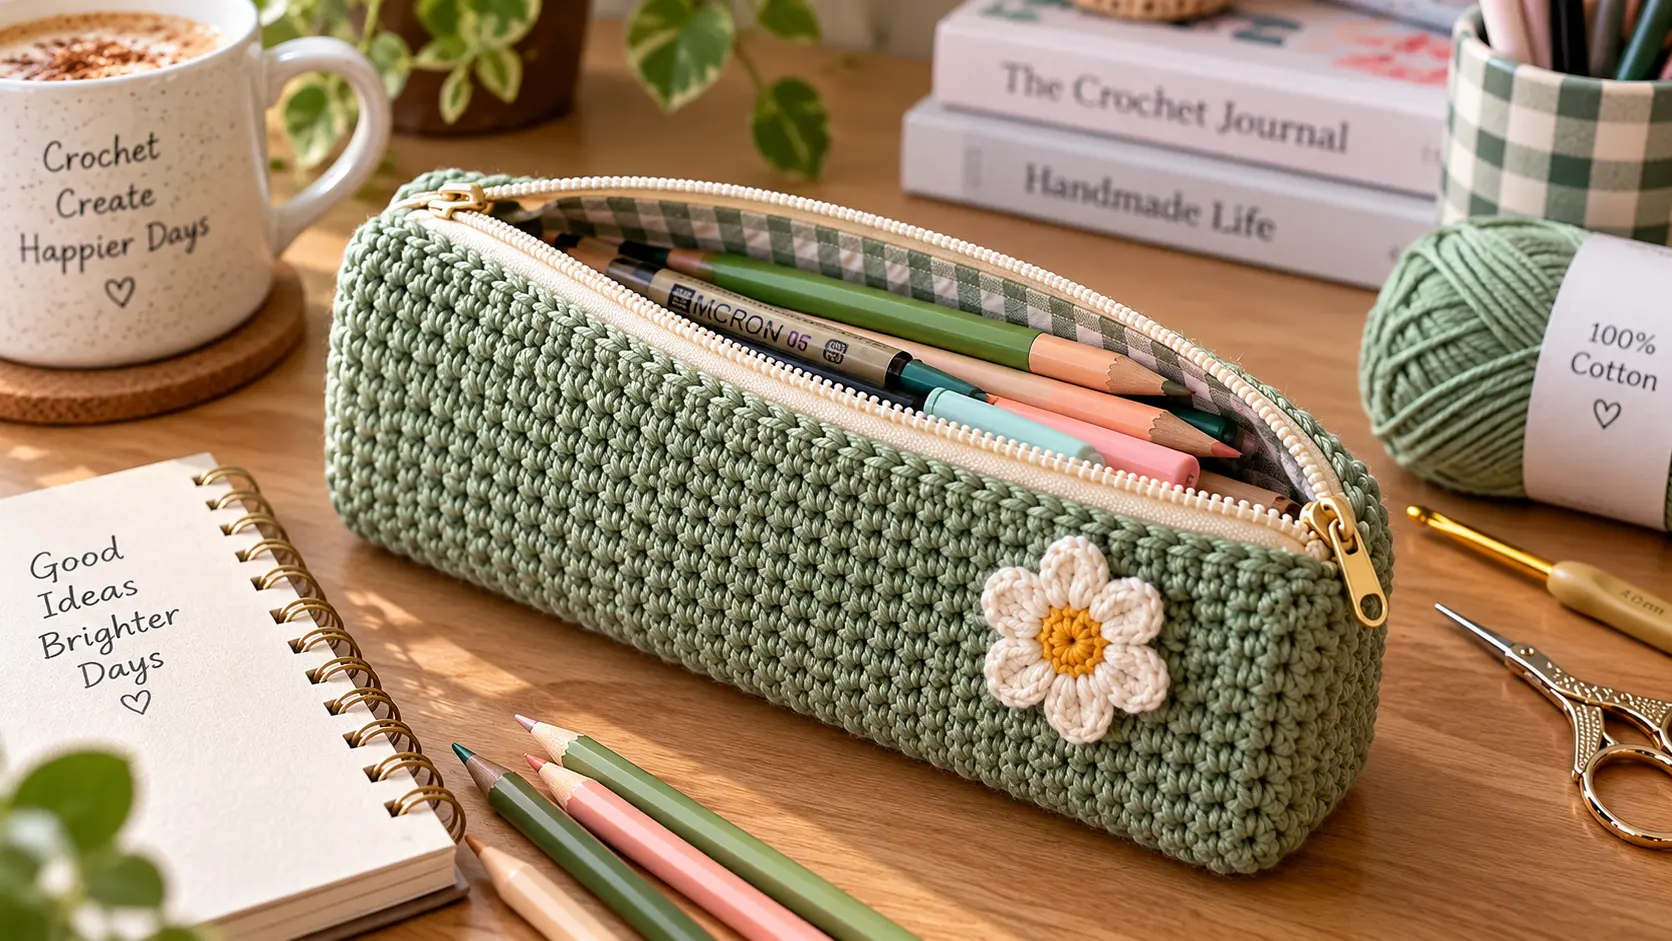
Looking for a simple crochet pencil case pattern that is practical, cute, and beginner-friendly? This easy project turns basic crochet stitches into a useful zippered pouch for pencils, pens, markers, crochet hooks, or other small essentials.
The pencil case is worked with a dense crochet fabric to help it hold its shape, then finished with a zipper for a clean and practical closure. You can keep it simple in one color, add stripes, use leftover yarn, or personalize it with your favorite color combination.
If you already know how to chain and single crochet, this is a great small project for practicing even tension, simple construction, seaming, and finishing.
Crochet Pencil Case Pattern at a Glance
| Detail | Information |
|---|---|
| Skill Level | Beginner |
| Crochet Terms | US |
| Main Stitch | Single Crochet |
| Construction | Two Flat Panels |
| Yarn | #4 Medium Cotton |
| Hook | 4 mm |
| Closure | Zipper |
| Finished Size | Approx. 8.5 × 4 in |
| Lining | Optional |
| Best For | Pencils, pens, markers & crochet hooks |
Finished measurements can vary depending on your yarn, hook size, and tension.
Why You’ll Love This Crochet Pencil Case
Small crochet projects are ideal when you want to make something useful without committing to a large project.
This pencil case is:
- Beginner-friendly
- Practical for everyday use
- Easy to customize
- Small enough to make relatively quickly
- Great for using leftover yarn
- Useful as a handmade gift
- Easy to resize
You can also use the finished pouch as a crochet hook case, small makeup pouch, travel organizer, or craft-supply case.
Materials You’ll Need
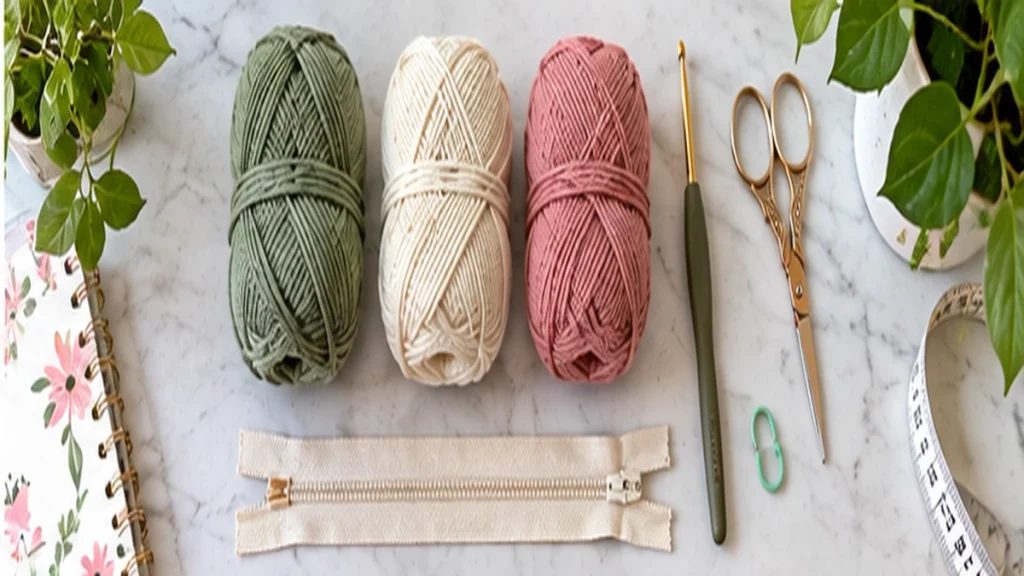
Gather the following supplies:
- #4 medium-weight cotton yarn
- 4 mm crochet hook
- Approximately 80–120 yards of yarn
- 8-inch zipper
- Yarn needle
- Sewing needle
- Matching sewing thread
- Scissors
- Stitch markers, optional
- Measuring tape
- Fabric for lining, optional
Why Cotton Yarn Works Well
Cotton is an excellent choice for a pencil case because it can create a firm fabric with good stitch definition.
A pencil case benefits from relatively dense stitches because pens and pencils place more pressure on the fabric than many decorative crochet projects.
Other pencil-case patterns similarly emphasize dense fabric and cotton or tightly worked stitches for structure and durability.
Crochet Abbreviations
This pattern uses US crochet terminology.
| Abbreviation | Meaning |
|---|---|
| ch | Chain |
| sc | Single Crochet |
| st | Stitch |
| sts | Stitches |
| sl st | Slip Stitch |
| FO | Fasten Off |
Before You Start
There are two important things to check before crocheting the entire pencil case.
Check Your Fabric
Crochet a small swatch.
Hold it up and gently stretch it.
If the gaps between stitches are large enough that a pencil tip could easily push through, try using a smaller hook.
The goal isn’t to make the fabric painfully tight. You simply want a reasonably dense and sturdy result.
Check Your Zipper
Measure your zipper before deciding on the final width of your panels.
Your crocheted piece should correspond closely to the usable length of the zipper.
This is much easier than finishing the entire pouch and discovering that your zipper doesn’t fit.
Free Crochet Pencil Case Pattern
For this beginner version, we’ll make two matching rectangles and join them together.
This makes the construction easy to understand and gives you plenty of control over the finished size.
Finished Size
Approximately:
8.5 inches wide × 4 inches tall
The exact measurement isn’t critical.
You can easily make the pencil case longer, shorter, taller, or smaller.
Step 1: Crochet the First Panel
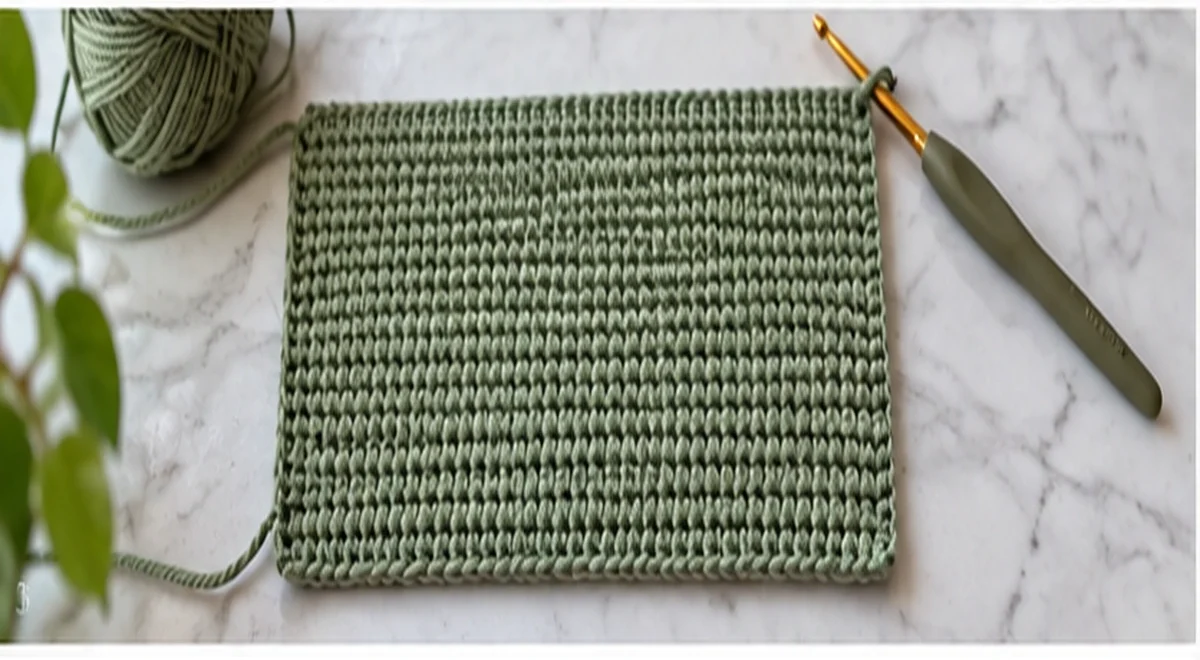
Using your 4 mm crochet hook:
Ch 36.
Row 1
Sc in the second chain from the hook.
Sc in every chain across.
35 sc
Turn.
Row 2
Ch 1.
Sc in every stitch across.
35 sc
Turn.
Rows 3–20
Repeat Row 2.
Your rectangle should measure approximately:
8.5 × 4 inches
Don’t worry if your measurements are slightly different.
Your personal tension, yarn, and hook can change the finished dimensions.
The most important thing is that the panel works with your chosen zipper and desired pencil-case size.
Step 2: Make the Second Panel
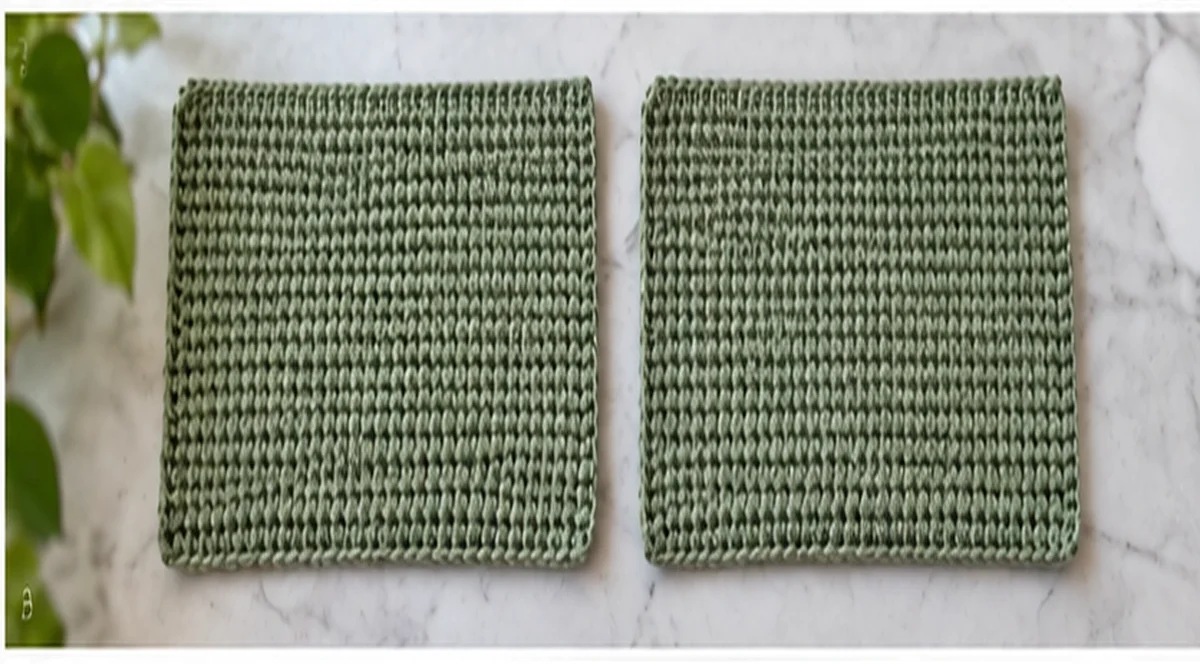
Repeat the exact same instructions to create another rectangle.
You should now have:
2 matching crochet panels
Place them together and compare their dimensions.
If one panel is noticeably larger, it’s better to correct the difference before assembly.
Step 3: Block the Panels
Blocking is optional but can make assembly easier.
Lightly shape the two rectangles so their edges are straight and their dimensions match.
Always use a blocking method appropriate for the yarn fiber you’re using.
Allow both pieces to dry completely before continuing.
Step 4: Position the Zipper
Place the zipper between the top edges of your two crochet panels.
Before sewing anything permanently, pin or clip everything into position.
Check that:
- The zipper is centered.
- Both crochet panels are aligned.
- The zipper can open completely.
- The crochet isn’t stretched excessively.
- The zipper teeth remain unobstructed.
Taking your time here can make a major difference in the finished appearance.
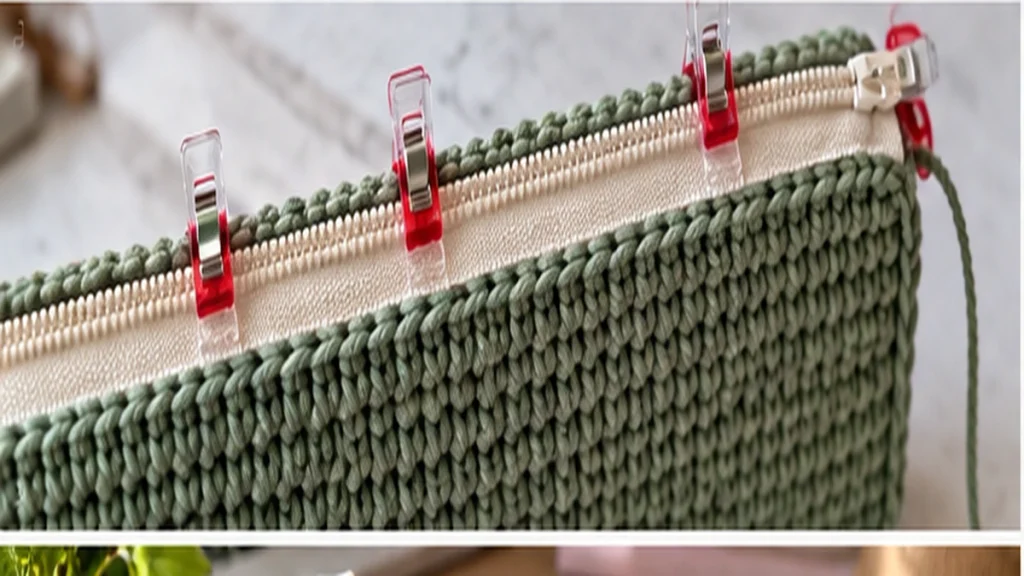
Step 5: Sew the Zipper
Using matching sewing thread and a sewing needle, sew one side of the zipper to the top edge of the first crochet panel.
Use small, consistent stitches.
Then sew the other side to the second panel.
Try not to sew too close to the zipper teeth.
After attaching both sides, open and close the zipper several times.
It should move smoothly without catching the yarn.
Beginner Zipper Tip
Don’t worry about making the stitches invisible.
Focus on:
straight + secure + functional.
Once the pencil case is finished and filled, tiny variations in hand sewing are usually far less noticeable than they seem while you’re working.
Step 6: Join the Pencil Case
Open the zipper slightly before joining the remaining edges.
This is important because you’ll need access to the inside later.
Place the panels with their edges aligned.
You can join them using either:
- Single crochet
- Slip stitch
- Whip stitch with a yarn needle
For a decorative handmade edge, single crochet is a good option.
Work around:
Side → Bottom → Side
Leave the zipper edge open.
Fasten off and weave in your ends securely.
Step 7: Turn and Shape the Case
If you joined the panels with the wrong sides facing outward, carefully turn the pouch right side out through the partially opened zipper.
Use your fingers to gently shape the corners.
Don’t force sharp objects into the corners because they can damage the crochet fabric.
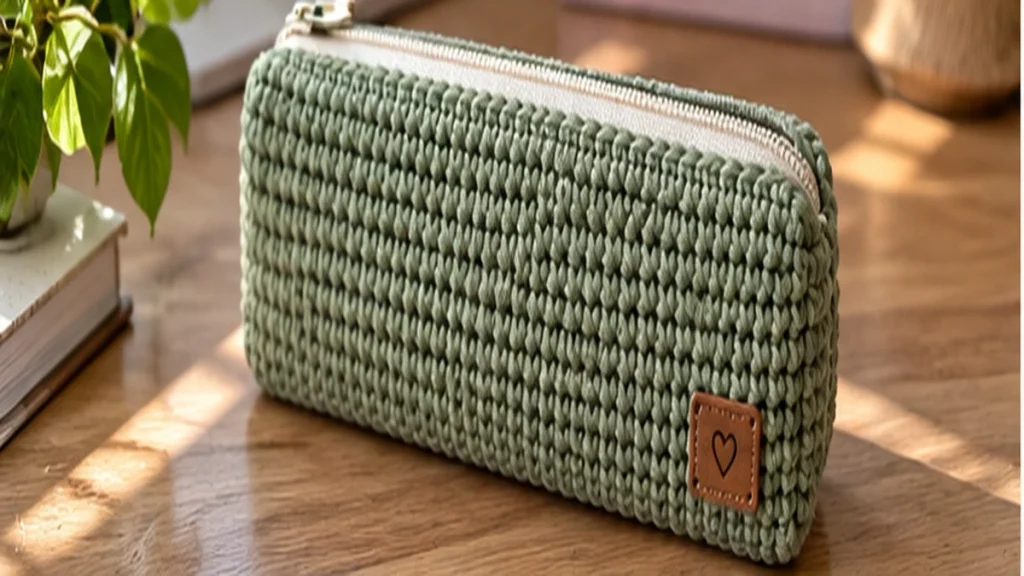
Your basic crochet pencil case is now complete.
Optional Fabric Lining
A lining isn’t required, but it can make a pencil case more structured and help protect the crochet fabric from sharp pencil tips and small items.
Other current pencil-case patterns also use or recommend optional fabric/felt linings for additional structure.
A simple lining can be made from two fabric rectangles.
Cut them slightly larger than the inside dimensions required for the pouch so you have room for seam allowances.
Sew the sides and bottom together.
Place the lining inside the crochet pouch.
Fold the raw upper edge inward and hand-sew it neatly near the zipper tape.
Make sure your lining doesn’t interfere with the zipper.
Do You Need a Lining?
Not necessarily.
For ordinary pens and larger supplies, a dense crochet fabric may work well without one.
Consider adding a lining if you plan to store:
- Sharpened pencils
- Small stitch markers
- Mechanical pencils
- Tiny craft supplies
- Makeup
- Items that could catch between stitches
How to Make the Pencil Case Wider
The foundation chain determines the approximate width.
For a wider pencil case:
Add more chains.
For a narrower pencil case:
Use fewer chains.
Rather than relying only on a fixed stitch count, compare your foundation chain with the zipper you plan to use.
How to Make It Taller
The number of rows controls the height.
Want more room for markers or crochet hooks?
Simply crochet additional rows on both panels.
Make sure both panels contain the same number of rows.
Easy Size Guide
| Use | Approximate Finished Size |
|---|---|
| Small Pen Pouch | 7 × 3 in |
| Standard Pencil Case | 8–9 × 4 in |
| Marker Case | 9–10 × 5 in |
| Crochet Hook Case | 9–11 × 4–5 in |
These are project ideas rather than strict sizing standards.
Customize the pouch around what you actually want to store.
How to Keep a Crochet Pencil Case Sturdy
A floppy pencil case can still work, but if you want more structure, several adjustments can help.
Use Cotton Yarn
Cotton often provides good stitch definition and structure for small accessories.
Use a Dense Stitch
Single crochet is a useful choice because it creates a relatively compact fabric.
Try a Smaller Hook
If your fabric has large gaps, going down a hook size may help.
Add a Fabric Lining
This can provide additional structure and prevent small items from pushing through the crochet.
Keep Your Tension Consistent
Large tension changes can create uneven edges and panels that don’t match.
Color Ideas
This pattern is intentionally simple so you can change the look easily.
Try:
Sage Green + Cream
A clean, modern combination.
Dusty Pink + Ivory
Soft and cozy.
Terracotta + Beige
Warm and handmade-looking.
Rainbow Stripes
Perfect for a colorful school pencil case.
Pastel Stripes
Try lavender, pink, sage, yellow, and cream.
School Colors
Customize the case using a student’s favorite colors.
Striped Crochet Pencil Case
You don’t have to change the construction to make a striped version.
Simply change yarn colors every few rows.
For example:
Rows 1–5: Cream
Rows 6–10: Sage
Rows 11–15: Cream
Rows 16–20: Terracotta
Make the second panel using the same sequence if you want the stripes to line up.
Or intentionally make the panels different for a playful look.
Scrap Yarn Pencil Case
Because the project is small, it can also be a useful stash-busting project.
Current pencil-case patterns frequently position this type of pouch as a good use for leftover yarn.
You could crochet every few rows in a different color.
For the cleanest result, choose yarns with similar weights and compatible fiber characteristics.
Crochet Pencil Case Without a Zipper
Don’t want to sew a zipper?
You can modify the project.
Possible closures include:
- Button and loop
- Drawstring
- Flap and button
- Snap closure
However, a zipper is particularly useful for a pencil case because it keeps small items securely contained.
Common Problems and How to Fix Them
My Pencil Case Is Too Floppy
Your fabric may be too loose.
Try:
- A smaller hook
- Tighter, more consistent tension
- Cotton yarn
- Adding a fabric lining
My Panels Are Different Sizes
Count your stitches and rows.
Even one accidentally added or missed stitch per row can gradually change the shape.
My Edges Are Slanted
Make sure you’re working into the first and last stitch correctly on every row.
Count frequently.
My Zipper Looks Wavy
The crochet may have been stretched while the zipper was sewn in.
Lay both pieces flat and pin the zipper before sewing.
Avoid pulling either the zipper or crochet fabric during installation.
My Pencil Tips Push Through the Crochet
The fabric may be too open.
Consider:
- A smaller hook
- Denser stitches
- Fabric lining
My Zipper Gets Stuck
Check whether yarn fibers or sewing stitches are too close to the zipper teeth.
Carefully move anything obstructing the zipper track.
Crochet Pencil Case Variations
Once you’ve made the basic pattern, you can turn it into many different designs.
Try:
Minimalist Pencil Case
One neutral color with a matching zipper.
Striped Pencil Case
Alternate colors every few rows.
Color-Block Pencil Case
Use one color for the lower half and another for the upper half.
Embroidered Pencil Case
Add small flowers, hearts, stars, initials, or simple decorative motifs.
Crochet Hook Pouch
Make it slightly longer to accommodate your favorite hooks.
Makeup Pouch
Increase both height and width and add a washable lining.
What Can You Put Inside?
Your finished crochet pouch isn’t limited to pencils.
Use it for:
- Pens
- Colored pencils
- Markers
- Crochet hooks
- Stitch markers
- Small scissors
- Measuring tape
- Makeup brushes
- Travel essentials
- Small craft tools
That makes this pattern useful even outside back-to-school season.
Is This a Good Beginner Crochet Project?
Yes, especially if you’re comfortable with:
- Slip knots
- Chains
- Single crochet
- Turning rows
- Counting stitches
The zipper is likely to be the newest skill for many beginners.
But because the crochet construction itself is simply two rectangles, you can focus on learning zipper installation without simultaneously dealing with complicated shaping.
How Long Does a Crochet Pencil Case Take?
The exact time depends on your crochet speed, yarn, size, and finishing method.
A small pencil case is generally much quicker than projects such as sweaters or blankets, making it a useful project when you want something you can finish relatively quickly.
Don’t rush the zipper installation. A few extra minutes spent aligning it can noticeably improve the finished pouch.
Frequently Asked Questions
What is the best yarn for a crochet pencil case?
Cotton is a strong option because it can create a structured fabric with clear stitch definition. Other yarns can work too, but choose something durable enough for regular handling.
What crochet stitch is best for a pencil case?
Single crochet works particularly well for this beginner pattern because it produces a relatively dense fabric and is easy to work consistently.
Can beginners crochet a pencil case?
Yes. This version uses two simple rectangular panels and basic single crochet. Attaching the zipper introduces a useful finishing skill.
Do I need to line a crochet pencil case?
No, but a lining can add structure and help prevent small or pointed objects from pushing through the crochet fabric.
Can I use acrylic yarn?
Yes. Acrylic can work, although the finished texture and structure may differ from cotton. Check your fabric before committing to the full project.
Can I make the pencil case without a zipper?
Yes. You can substitute a button, flap, snap, or drawstring closure, although the construction will need to be adjusted.
Can I use this as a crochet hook case?
Absolutely. Make the pouch long enough for your hooks and consider adding a lining if you’re storing smaller notions with them.
How do I make a larger pencil case?
Increase the number of foundation chains for width and add more rows for height. Measure against your intended zipper and contents rather than relying only on a fixed stitch count.
Final Thoughts
This crochet pencil case pattern is a simple way to turn basic crochet skills into something genuinely useful.
The two-panel construction keeps the crochet straightforward, while the zipper gives the finished pouch a clean and practical look.
Once you understand the basic construction, don’t stop at one.
Experiment with stripes, color blocking, embroidery, different sizes, and leftover yarn to create pencil cases for school, work, crochet supplies, travel, or handmade gifts.