
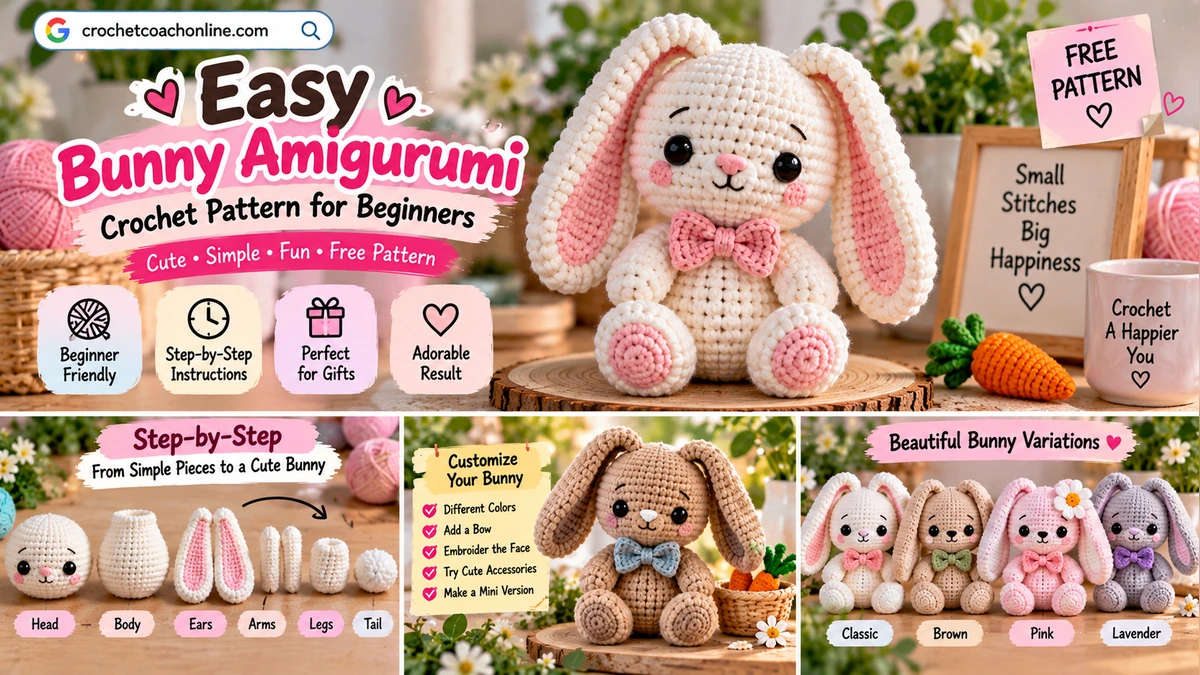
Looking for a cute crochet animal that’s simple enough for a beginner?
This bunny amigurumi pattern walks you through making an adorable little rabbit with long floppy ears, a round head, soft body, tiny arms and legs, and a fluffy tail.
The pattern uses basic amigurumi techniques and simple shapes, making it a great next project after learning how to crochet in the round.
Bunny Amigurumi Pattern at a Glance
| Detail | Pattern Info |
|---|---|
| Skill Level | Beginner / Advanced Beginner |
| Crochet Terms | US |
| Construction | Separate simple pieces |
| Main Stitch | Single Crochet |
| Yarn | DK or Worsted Weight |
| Hook | 3.0–3.5 mm |
| Approx. Time | 3–4 hours |
| Main Color | Cream, White or Pastel |
| Stuffing | Polyester Fiberfill |
Simple shapes and basic stitches are also common across current beginner bunny patterns.
Materials You’ll Need
Prepare:
- Cream, white or light brown yarn
- Small amount of pink yarn
- Black embroidery thread
- 3.0–3.5 mm crochet hook
- Polyester fiberfill
- Yarn needle
- Scissors
- Stitch marker
- Pins
- Optional safety eyes
- Optional pom-pom for the tail
For your first bunny, I recommend smooth cotton or acrylic yarn because it makes the individual stitches easier to see.
Crochet Abbreviations
This pattern uses US crochet terminology.
| Abbreviation | Meaning |
|---|---|
| MR | Magic Ring |
| sc | Single Crochet |
| inc | Increase |
| dec | Decrease |
| ch | Chain |
| sl st | Slip Stitch |
| st | Stitch |
| sts | Stitches |
| FO | Fasten Off |
You can also check the Craft Yarn Council Crochet Abbreviations Master List for standard U.S. crochet terminology.
Before You Start
Work in continuous spiral rounds unless the instructions say otherwise.
Place a stitch marker in the first stitch of every round.
The number shown in parentheses is the stitch count you should have when that round is complete.
For example:
(2 sc, inc) × 6 (24)
means:
2 single crochet, 1 increase, repeated six times = 24 stitches.
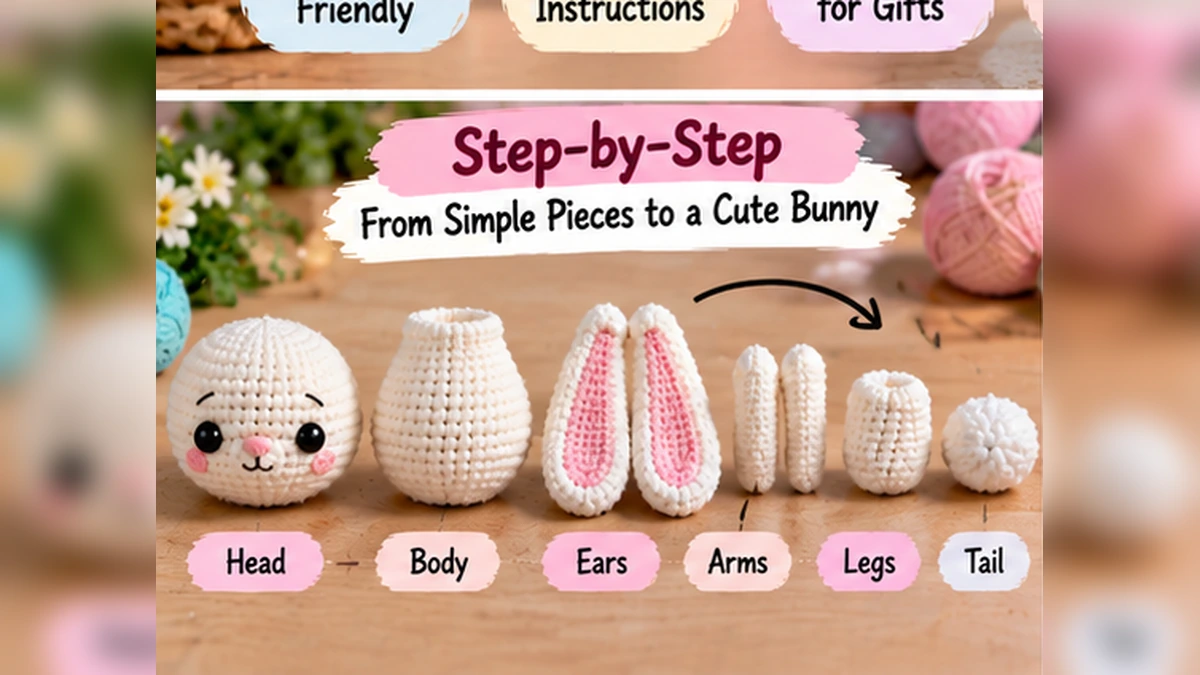
Step 1: Crochet the Bunny Head
Use your main yarn color.
Round 1: 6 sc in MR (6)
Round 2: inc × 6 (12)
Round 3: (1 sc, inc) × 6 (18)
Round 4: (2 sc, inc) × 6 (24)
Round 5: (3 sc, inc) × 6 (30)
Rounds 6–11: sc around (30)
If you’re using safety eyes, position them approximately between Rounds 8 and 9.
Leave enough space between them for the nose.
Then continue:
Round 12: (3 sc, dec) × 6 (24)
Round 13: (2 sc, dec) × 6 (18)
Start stuffing the head.
Round 14: (1 sc, dec) × 6 (12)
Finish stuffing.
Round 15: dec × 6 (6)
FO and close the opening.
You should now have a smooth round bunny head.
Step 2: Crochet the Bunny Body
Use the main color.
Round 1: 6 sc in MR (6)
Round 2: inc × 6 (12)
Round 3: (1 sc, inc) × 6 (18)
Round 4: (2 sc, inc) × 6 (24)
Rounds 5–10: sc around (24)
Round 11: (2 sc, dec) × 6 (18)
Rounds 12–13: sc around (18)
Start stuffing.
Round 14: (1 sc, dec) × 6 (12)
Finish stuffing while keeping the top slightly flexible for assembly.
FO, leaving a long sewing tail.
Step 3: Crochet the Long Bunny Ears
Make 2.
The long ears are one of the most recognizable features of this design, and floppy-ear construction is also prominent in current bunny patterns.
Use the main color.
Round 1: 6 sc in MR (6)
Round 2: (1 sc, inc) × 3 (9)
Round 3: (2 sc, inc) × 3 (12)
Rounds 4–10: sc around (12)
Round 11: (2 sc, dec) × 3 (9)
Rounds 12–14: sc around (9)
Don’t stuff the ears.
Flatten each ear gently.
FO, leaving a long tail.
Optional Pink Inner Ear
Instead of making another complete piece, embroider a simple vertical pink section inside each ear.
This keeps assembly easier.
Step 4: Crochet the Bunny Arms
Make 2.
Round 1: 6 sc in MR (6)
Round 2: (1 sc, inc) × 3 (9)
Rounds 3–6: sc around (9)
Add only a tiny amount of stuffing to the bottom.
Round 7: (1 sc, dec) × 3 (6)
FO with a long sewing tail.
Step 5: Crochet the Bunny Legs
Make 2.
Round 1: 6 sc in MR (6)
Round 2: inc × 6 (12)
Rounds 3–5: sc around (12)
Stuff lightly.
Round 6: (2 sc, dec) × 3 (9)
Round 7: sc around (9)
FO with a long sewing tail.
The slightly larger feet help the finished bunny sit more naturally.
Step 6: Crochet the Bunny Tail
Use the main color.
Round 1: 6 sc in MR (6)
Round 2: inc × 6 (12)
Round 3: sc around (12)
Round 4: dec × 6 (6)
Add a tiny amount of stuffing.
FO with a long tail.
Alternatively, you can make a small yarn pom-pom.
Step 7: Add the Bunny Face
Now give your bunny some personality.
Embroider a tiny nose using pink yarn.
From the bottom of the nose, add a short vertical black line.
Then embroider a small curved mouth.
You can also add:
- Pink cheeks
- Eyebrows
- Sleepy embroidered eyes
- Tiny eyelashes
For a toy intended for a very young child, I would use embroidered facial details instead of removable plastic components.
Step 8: Assemble Your Bunny
This step makes a huge difference to the final appearance.
Don’t sew immediately.
Pin everything first.
Position:
- Head on top of body
- Ears on top of head
- Arms on each side
- Legs near the bottom
- Tail at the back
Put the bunny on a flat surface.
Look at it from the front, side and back.
Make sure the ears are balanced and the bunny sits correctly.
Then sew everything securely.
Your Finished Bunny Amigurumi
Your bunny should now have:
✓ Round head
✓ Soft body
✓ Two long floppy ears
✓ Two little arms
✓ Two feet
✓ Small fluffy tail
✓ Cute embroidered face
Don’t worry if your finished bunny isn’t identical to another one.
Small differences in tension, stuffing and yarn are exactly what give handmade amigurumi its personality.
7 Cute Bunny Variations
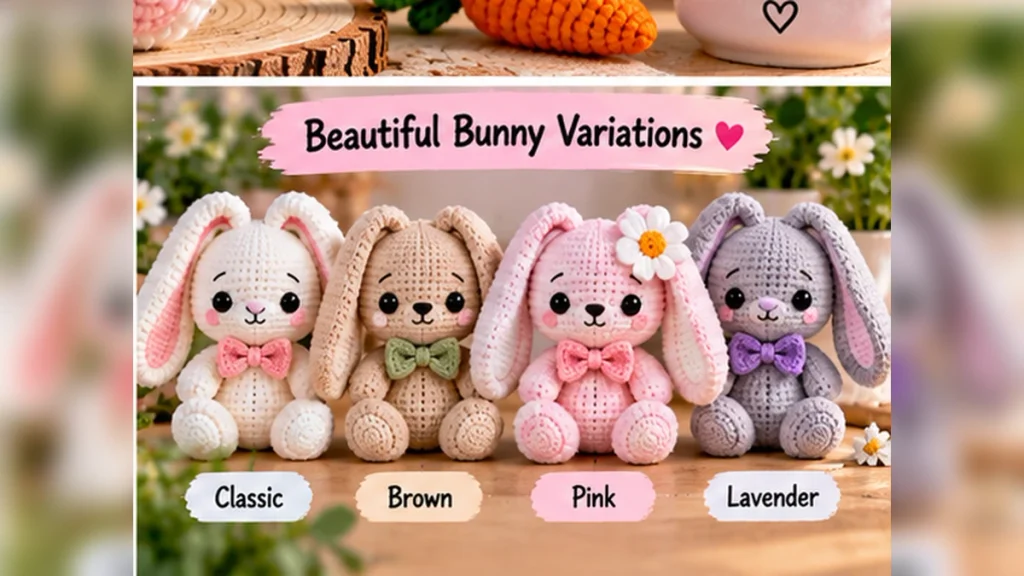
Once you’ve completed the basic pattern, you can create several versions from the same design.
1. Classic White Bunny
White yarn + pink inner ears.
2. Brown Woodland Bunny
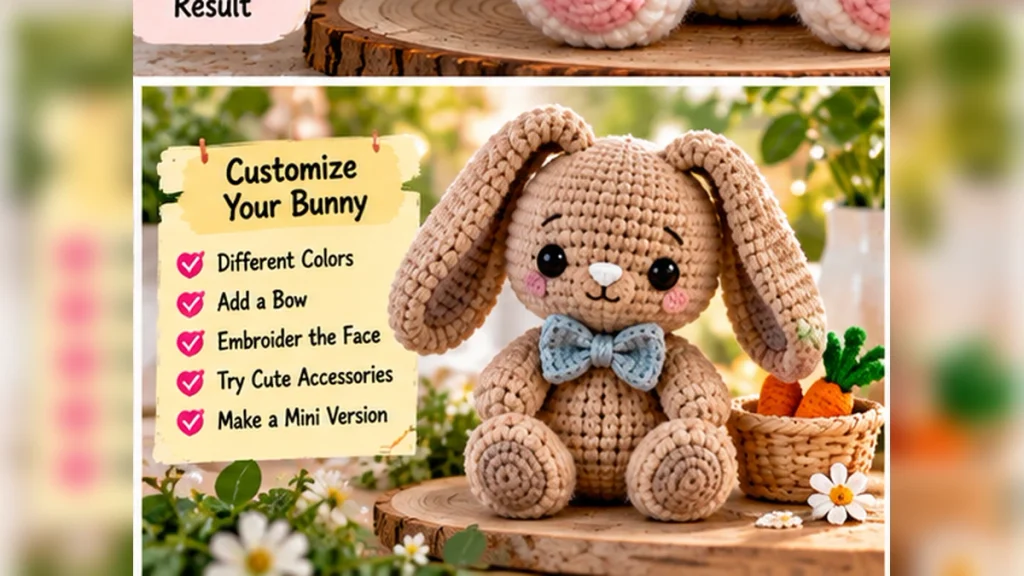
Use warm brown or beige yarn for a more natural rabbit look.
3. Pink Bunny
Use pastel pink with cream details.
4. Lavender Bunny
A strong option for cute Pinterest photography.
5. Flower Bunny
Sew a tiny crochet flower beside one ear.
6. Bunny With a Bow
Add a small ribbon or crocheted bow around the neck.
7. Easter Bunny
Give the bunny a tiny crochet carrot or pastel egg.
Want to Make a Mini Bunny?
mini amigurumi bunny
You don’t necessarily need to redesign the entire bunny.
Try:
- Thinner yarn
- Smaller crochet hook
- Less stuffing
- Embroidered eyes
- Shorter ears if desired
Keep your stitches tight enough that the fiberfill doesn’t show.
What About a Plush Bunny?
You can also make the bunny with chenille or plush yarn.
Current bunny tutorials use everything from medium acrylic to super-bulky chenille, so yarn choice can dramatically change the final size and appearance.
For plush yarn:
- Use an appropriate larger hook.
- Don’t overstuff.
- Use stitch markers carefully because stitches can be harder to see.
- Expect a significantly larger finished bunny.
If you’re completely new to amigurumi, smooth yarn is still easier for your first attempt.
Common Bunny Amigurumi Mistakes
The ears point in different directions
Pin both ears before sewing either permanently.
Stuffing shows between stitches
Use a smaller hook or tighter tension.
The head tilts forward
Make sure the body is firmly stuffed around the neck area.
Bunny won’t sit upright
Adjust the leg positions before sewing.
One ear is longer
Count every round carefully.
Body looks lumpy
Add fiberfill in several small pieces rather than one large ball.
Safety eyes are loose
Don’t rely on loose plastic parts for a toy intended for small children. Embroidered eyes are the simpler alternative.
Bunny Amigurumi FAQ
Is bunny amigurumi suitable for beginners?
Yes. Several current bunny patterns specifically target beginners using basic stitches, simple shapes and continuous rounds.
How long does a bunny take to crochet?
For this multi-piece design, allow roughly 3–4 hours when you’re learning. Current beginner designs vary considerably: some simplified constructions can take only a couple of hours, while larger detailed versions can take longer.
What is the best yarn for a beginner?
Smooth cotton or acrylic yarn is easiest because you can clearly see the stitches.
Do I have to use safety eyes?
No. Embroidered eyes work very well and can give the bunny an especially cute handmade expression.
Why are my bunny ears curling?
Your tension may be uneven. Flatten and gently shape the ears before attaching them.
Can I sell finished bunnies?
More Cute Amigurumi Patterns
Easy Frog Amigurumi Crochet Pattern for Beginners
Easy Mushroom Amigurumi Crochet Pattern for Beginners
Easy Capybara Amigurumi Crochet Pattern for Beginners
Cute Axolotl Amigurumi Crochet Pattern for Beginners
15 Easy No-Sew Amigurumi Patterns for Beginners
15 Unique Amigurumi Ideas to Crochet in 2026
Final Thoughts
This bunny amigurumi pattern is a fun way to practice the essential techniques you’ll use across many crochet animals.
Start with the basic bunny, then experiment with different colors, longer ears, tiny flowers, bows or seasonal accessories.
And once you’ve made one, don’t be surprised if your next project becomes an entire little bunny family.